Konten ini belum dioptimalkan untuk perangkat seluler.
Untuk pengalaman terbaik, kunjungi kami dengan komputer desktop menggunakan link yang dikirim melalui email.
Overview
In this lab, you create a secure network infrastructure for your database migration projects. You create both public and private VPCs with appropriate firewall rules in each. You add virtual machines to each network and test the communication between them. You do all of this using Terraform to demonstrate a more real-world workflow that you can use in your migration projects.
Objectives
In this lab, you learn how to perform the following tasks with Terraform:
Automate network creation.
Create firewall rules.
Create virtual machines.
Create a private network.
Setup and requirements
In this task, you perform initialization steps for your lab.
For each lab, you get a new Google Cloud project and set of resources for a fixed time at no cost.
Sign in to Google Skills using an incognito window.
Note the lab's access time (for example, 1:15:00), and make sure you can finish within that time.
There is no pause feature. You can restart if needed, but you have to start at the beginning.
When ready, click Start lab.
Note your lab credentials (Username and Password). You will use them to sign in to the Google Cloud Console.
Click Open Google Console.
Click Use another account and copy/paste credentials for this lab into the prompts.
If you use other credentials, you'll receive errors or incur charges.
Accept the terms and skip the recovery resource page.
Task 1. Use Terraform to automate network creation
In the Navigation menu (), click Home.
In the Project info section, find your Project ID and copy and paste it into a text file. You will need it later.
Click the Activate Cloud Shell () icon in the upper right of the Console. The Cloud Shell terminal opens in a pane at the bottom of the window.
Create a directory called terraform-networks and change to it:
Enter ls to verify that your files were created in the terraform-networks folder.
Click Open Editor in Cloud Shell, and then select the terraform-networks folder and open the provider.tf file.
Enter the following code to configure the Google Cloud Terraform provider:
terraform {
required_version = ">= 0.12"
}
provider "google" {
project = var.project_id
region = var.gcp_region_1
zone = var.gcp_zone_1
}
Notice the variables in the above code. You create those and some other variables now.
Open the variables.tf file and enter the following code:
# GCP Project ID
variable "project_id" {
type = string
description = "GCP Project ID"
}
# Region to use for Subnet 1
variable "gcp_region_1" {
type = string
description = "GCP Region"
}
# Zone used for VMs
variable "gcp_zone_1" {
type = string
description = "GCP Zone"
}
# Define subnet for public network
variable "subnet_cidr_public" {
type = string
description = "Subnet CIDR for Public Network"
}
You defined the variables in the previous file, and you set the variables in another file.
Open the terraform.tfvars file and add the following code:
Open the vpc-network-public.tf file and add the following:
resource "google_compute_network" "public-vpc" {
name = "public-vpc"
auto_create_subnetworks = "false"
routing_mode = "GLOBAL"
}
resource "google_compute_subnetwork" "public-subnet_1" {
name = "public-subnet-1"
ip_cidr_range = var.subnet_cidr_public
network = google_compute_network.public-vpc.name
region = var.gcp_region_1
}
Note: The above Terraform code creates a VPC with one subnet. In the subnet, notice the two variables for ip_cidr_range and region. Also notice how the network property refers back to the VPC created before the subnet.
To confirm that the procedure has worked up to this point, in the Google Cloud Console, on the Navigation menu (), click VPC network. You should have one network named default.
In Cloud Shell, click Open Terminal. Make sure you are in the correct folder:
cd ~/terraform-networks
To initialize Terraform, enter the following command:
terraform init
A message should indicate that "Terraform has been successfully initialized!".
To build the Terraform plan, enter the following command:
terraform plan
Make sure there are no errors and look at what resources will be created.
The plan should tell you that two resources will be created: a network and a subnetwork.
To create the resources, run the following command:
terraform apply -auto-approve
The -auto-approve parameter runs the script without prompting you.
Wait for the script to complete, and then in the Console, click Refresh in the VPC networks toolbar. You see your new network and subnet.
You're not done configuring the network.
Delete what you just created with the following command:
terraform destroy -auto-approve
Click Refresh to verify that the network was deleted.
Click Check my progress to verify the objective.
Use Terraform to automate network creation
Review
At this point, you have used Terraform to create a network and subnet. Next, you create some firewall rules.
Task 2. Use Terraform to create firewall rules
In Cloud Shell, click Open Editor. Open the vpc-firewall-rules-public.tf file in the terraform-networks folder.
To add a firewall rule that will allow SSH into machines in this network, add the following code:
# allow ssh
resource "google_compute_firewall" "public-allow-ssh" {
name = "${google_compute_network.public-vpc.name}-allow-ssh"
network = google_compute_network.public-vpc.name
allow {
protocol = "tcp"
ports = ["22"]
}
source_ranges = [
"0.0.0.0/0"
]
target_tags = ["allow-ssh"]
}
Note: This rule allows SSH from everywhere, but only to machines that have the "allow-ssh" tag.
Windows machines require RDP, not SSH. Add the following RDP rule below the SSH rule:
Add the following rule below the previous rules to enable it:
# allow ping only from everywhere
resource "google_compute_firewall" "public-allow-ping" {
name = "${google_compute_network.public-vpc.name}-allow-ping"
network = google_compute_network.public-vpc.name
allow {
protocol = "icmp"
}
source_ranges = [
"0.0.0.0/0"
]
}
As you did before, switch the terminal and run the following command to check for errors and see what will be created:
terraform plan
Run the following Terraform command and verify that the network, subnet, and firewall rules are all being created using the Console:
terraform apply -auto-approve
Click Check my progress to verify the objective.
Use Terraform to create firewall rules
Review
Now you have a network and some firewall rules. Next, you add a test server to the network and see whether the firewall rules work.
Task 3. Use Terraform to create virtual machines
Open the Cloud Shell code editor, and then open the file random-id-generator.tf and add the following code:
# Terraform plugin for creating random ids
resource "random_id" "instance_id" {
byte_length = 4
}
This Terraform plug-in is used to generate a unique name for VMs added programatically.
To create a virtual machine in the public network, open the test-server-linux.tf file and add the following code:
# Create Test Server in Public VPC
resource "google_compute_instance" "test-server-linux" {
name = "public-test-server-linux-${random_id.instance_id.hex}"
machine_type = "f1-micro"
zone = var.gcp_zone_1
tags = ["allow-ssh"]
boot_disk {
initialize_params {
image = "debian-cloud/debian-11"
}
}
metadata_startup_script = "sudo apt-get update;"
network_interface {
network = google_compute_network.public-vpc.name
subnetwork = google_compute_subnetwork.public-subnet_1.name
access_config { }
}
}
output "test-server-linux" {
value = google_compute_instance.test-server-linux.name
}
output "test-server-linux-external-ip" {
value = google_compute_instance.test-server-linux.network_interface.0.access_config.0.nat_ip
}
output "test-server-linux-internal-ip" {
value = google_compute_instance.test-server-linux.network_interface.0.network_ip
}
Note: The output variables will return the name and internal and external IP addresses for the machine created. Also, this machine is tagged with the "allow-ssh" tag so you can connect to it.
Lastly, take a look at the code in the network_interface section that configures this machine to be in the public network you created earlier.
Run the Terraform plan and apply commands as you did earlier to create this machine. If an error appears, you may need to run terraform init again before running the other two commands.
When the commands complete, you should see the VM name and internal and external IP addresses.
From the Cloud Shell terminal, make sure you can ping the external IP address of that machine.
In the Console, go to the Compute Engine service to see the VM you just created.
Click SSH to make sure your firewall rule works, and then exit the SSH session.
Click Check my progress to verify the objective.
Use Terraform to create virtual machines
Task 4. Use Terraform to create a private network
Use the configuration of the public network as a guide and create a second private network. In the variables.tf file, add a variable for the private subnet IP CIDR range, and set its value in the terraform.tfvars file.
Duplicate the vpc-network-public.tf file and change the names and variables appropriately.
Using the public firewall rules as a guide, add firewall rules for the private network. In the source_ranges section, don't allow traffic from all sources: only allow traffic from the public subnet IP CIDR range.
Create a test server in the private network, using the public one as a guide.
Note: Try to complete this lab on your own. If you get stuck, there is a complete solution in GitHub at the following URL: GoogleCloudPlatform/training-data-analyst.
When you have everything created, try to SSH into the public test server. The server in the private network won't be accessible yet. You will fix that in the next lab.
Congratulations! You have created a secure network infrastructure for your database migration projects. You created both public and private VPCs with appropriate firewall rules in each. You added virtual machines to each network and tested the communication between them. You did all of this using Terraform.
End your lab
When you have completed your lab, click End Lab. Google Skills removes the resources you’ve used and cleans the account for you.
You will be given an opportunity to rate the lab experience. Select the applicable number of stars, type a comment, and then click Submit.
The number of stars indicates the following:
1 star = Very dissatisfied
2 stars = Dissatisfied
3 stars = Neutral
4 stars = Satisfied
5 stars = Very satisfied
You can close the dialog box if you don't want to provide feedback.
For feedback, suggestions, or corrections, please use the Support tab.
Copyright 2026 Google LLC All rights reserved. Google and the Google logo are trademarks of Google LLC. All other company and product names may be trademarks of the respective companies with which they are associated.
Lab membuat project dan resource Google Cloud untuk jangka waktu tertentu
Lab memiliki batas waktu dan tidak memiliki fitur jeda. Jika lab diakhiri, Anda harus memulainya lagi dari awal.
Di kiri atas layar, klik Start lab untuk memulai
Gunakan penjelajahan rahasia
Salin Nama Pengguna dan Sandi yang diberikan untuk lab tersebut
Klik Open console dalam mode pribadi
Login ke Konsol
Login menggunakan kredensial lab Anda. Menggunakan kredensial lain mungkin menyebabkan error atau dikenai biaya.
Setujui persyaratan, dan lewati halaman resource pemulihan
Jangan klik End lab kecuali jika Anda sudah menyelesaikan lab atau ingin mengulanginya, karena tindakan ini akan menghapus pekerjaan Anda dan menghapus project
Konten ini tidak tersedia untuk saat ini
Kami akan memberi tahu Anda melalui email saat konten tersedia
Bagus!
Kami akan menghubungi Anda melalui email saat konten tersedia
Satu lab dalam satu waktu
Konfirmasi untuk mengakhiri semua lab yang ada dan memulai lab ini
Gunakan penjelajahan rahasia untuk menjalankan lab
Menggunakan jendela Samaran atau browser pribadi adalah cara terbaik untuk menjalankan lab ini. Langkah ini akan mencegah konflik antara akun pribadi Anda dan akun Siswa, yang dapat menyebabkan tagihan ekstra pada akun pribadi Anda.
In this lab, you will create a secure network infrastructure for you database migration projects. You will create both public and private VPCs with appropriate firewall rules in each. You will add virtual machines to each network and test the commnication between them. You will do all of this using Terraform to demonstrate a more real-world workflow that you can use in your migration projects.

 ), click Home.
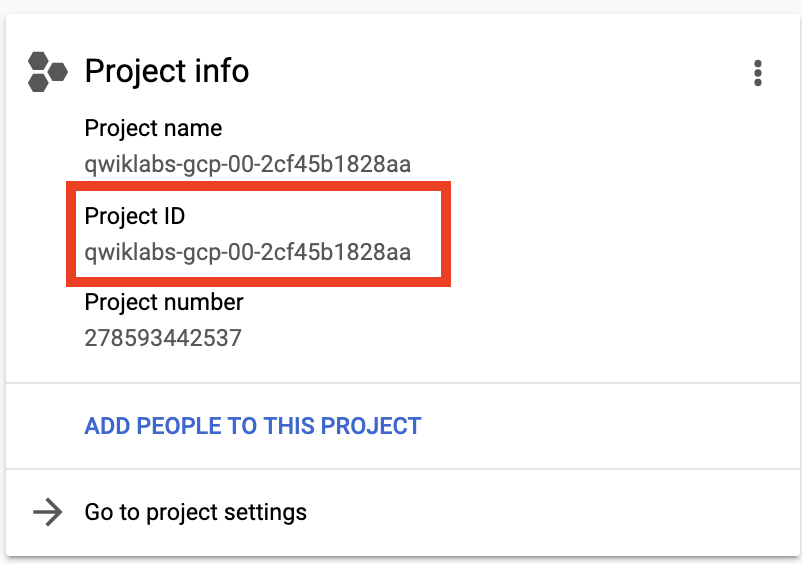
 ) icon in the upper right of the Console. The Cloud Shell terminal opens in a pane at the bottom of the window.


