


Before you begin
- Labs create a Google Cloud project and resources for a fixed time
- Labs have a time limit and no pause feature. If you end the lab, you'll have to restart from the beginning.
- On the top left of your screen, click Start lab to begin
Create the cloud resources
/ 30
Retrieve the Python files and configure them
/ 20
Generate synthetic data and run the pipeline
/ 30
Verify the results in BigQuery
/ 20

Imagine you are a data engineer for Cymbal Gaming. You and the development team are building a new e-sports game, "Galactic Grand Prix." The game produces real-time data based on heads-up games between two players from different teams. For example, two players will compete in one event. A winner is determined, and then points are awarded to the winning player and team. You are tasked with building a solution to handle this streamed data, leveraging a Dataflow pipeline to ingest data from Pub/Sub, transform it using Python code, and store the results in BigQuery tables. These tables will then be used to visualize the results as player and team dashboards.
You have read that Pub/Sub, Dataflow and BigQuery could be used for this type of use case. You have also learned that Gemini can help you along the way, for example, if you get stuck with writing a new query you could use Code Assist to help review and debug your code. It could even help you with suggestions to resolve issues. Using these features will help you to be more independent in your work and, perhaps, even more efficient. However, you are not sure how to get started.
When you start the lab, the environment will contain the resources shown in the following diagram.
By the end of the lab, you will have used the architecture to perform several tasks.
The following table provides a detailed explanation of each task in relation to the lab architecture.
| Numbered Task | Detail |
|---|---|
| 1. | Configure environment variables in Cloud Shell. |
| 2. |
Create the cloud resources: You will use Cloud Shell commands to create the Pub/Sub topic and subscription, and the BigQuery dataset. |
| 3. |
Retrieve the Python files from the repo: In this task, you retrieve the Python files from the repo and configure them for your project. |
| 4. |
Generate synthetic data and run the pipeline: With the Python files configured for your project, you will then run the files to generate synthetic data and initiate the pipeline. The esports-simulation.py file uses Python to generate continuous Pub/Sub messages for game events. You can then run the esports-pipeline.py file. Running this file launches a Dataflow pipeline that ingests the messages, transform them, and record the results to the raw_events, player score updates and team score updates tables in BigQuery. |
| 5. |
Verify the results in BigQuery: Now that you have consumed and transformed the data, and written the records to the tables in BigQuery, it is time to verify the results. You will run queries on each table to analyze and view the results. |
In this lab, you learn how to:
Finally, you will have time to reflect on what you have learned in this lab and consider how you could address your own use cases with streaming data, and answer questions in your Lab Journal.
Read these instructions. Labs are timed and you cannot pause them. The timer, which starts when you click Start Lab, shows how long Google Cloud resources are made available to you.
This hands-on lab lets you do the lab activities in a real cloud environment, not in a simulation or demo environment. It does so by giving you new, temporary credentials you use to sign in and access Google Cloud for the duration of the lab.
To complete this lab, you need:
Click the Start Lab button. If you need to pay for the lab, a dialog opens for you to select your payment method. On the left is the Lab Details pane with the following:
Click Open Google Cloud console (or right-click and select Open Link in Incognito Window if you are running the Chrome browser).
The lab spins up resources, and then opens another tab that shows the Sign in page.
Tip: Arrange the tabs in separate windows, side-by-side.
If necessary, copy the Username below and paste it into the Sign in dialog.
You can also find the Username in the Lab Details pane.
Click Next.
Copy the Password below and paste it into the Welcome dialog.
You can also find the Password in the Lab Details pane.
Click Next.
Click through the subsequent pages:
After a few moments, the Google Cloud console opens in this tab.

In this task, you configure environment variables in Cloud Shell.
Open Cloud Shell.
You need to authorize use, as this is the first time you use Cloud Shell in this lab. To do this, click Authorize on the pop-up window.
Run the following commands.
Run the commands below to confirm the variables are stored.
In this task, you will create the cloud resources including the Pub/Sub topic and subscription, and the BigQuery dataset using Cloud Shell.
While remaining in Cloud Shell:
Run the following command to create the Pub/Sub topic.
Run the following command to create the Pub/Sub subscription.
Run the following command to create the BigQuery dataset.
At the top of the console, there is a search function. Enter Pub/Sub here, and click Pub/Sub from the options listed. You see Pub/Sub topics listed, including the esports_events_topic.
Click on esports_events_topic, which is the topic ID. You see the Subscriptions tab appear for the topic, and the esports_events_topic-sub subscription is listed. This confirms you successfully created the topic and the subscription.
Return to the search function at the top of the console. Enter BigQuery here, and click BigQuery from the options listed. You see the Welcome to BigQuery Studio page appears with a pop-up for Welcome to BigQuery in the Cloud Console.
Click Done.
Within the Explorer pane, expand your project.
Notice at the bottom of the list, you see the esports_analytics dataset. This confirms you successfully created the BigQuery dataset.
Click Check my progress to verify the objective.
You will now use wget in Cloud Shell to retrieve the Python files from a public Cloud Storage bucket. Once retrieved you will open the files in Cloud Shell Editor and use the Code Assist feature of Gemini to explain how each file works. Finally you will use the Cloud Shell Editor to configure the files with details for your project and Cloud Storage bucket.
Return to Cloud Shell.
Run the following command to return to the home directory.
Create the esports directory and navigate to it.
Retrive the Python files using the wget commands below.
You see confirmation in the terminal that the files are downloaded.
Click on the Open Editor button in Cloud Shell. You see the Cloud Shell Editor open. You also see the Gemini Code Assist pane.
Close the Walkthrough tab.
In the Explorer pane, expand the esports folder. You see the Python files displayed.
Open the esports-simulation.py file.
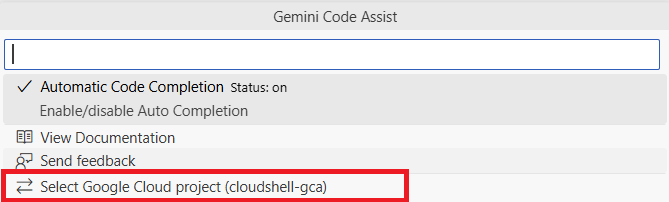
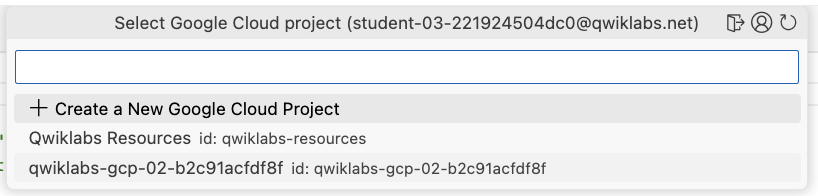
At the top right of the file, click the arrow next to Gemini 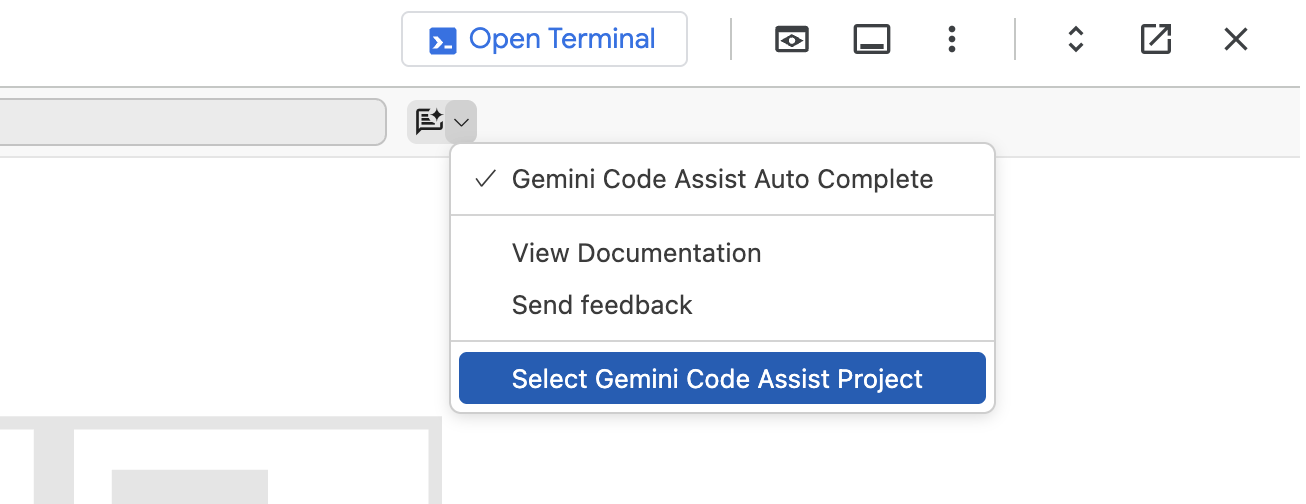
Click on Select Gemini Code Assist Project, to select the project to use for Gemini. From the list, select
Within the Gemini Code Assist pane, at the bottom, you see a place to enter a prompt, where you see "Ask Gemini." Enter the following prompt:
You see that Code Assist explains what the code does in detail. At a high level the code will simulate an esports match of events and publishes these to a Google Cloud Pub/Sub topic.
Now use the same process to explain what the esports-pipeline.py file does with this prompt.
Using your own words, what does the esports-pipeline.py file do?
Considering your data and use cases, think of how you would use a Dataflow pipeline to consume Pub/Sub messages, to transform the data within them and store the reults in BigQuery.
Click Check my progress to verify the objective.
While still in the esports-pipeline.py file:
Around line 11, set the PROJECT_ID variable to your Project_ID. You can find this at the top of the Google Cloud Console or simply replace the line with the code below.
Around line 18, set the GCS_TEMP_LOCATION variable to your Cloud Storage bucket name (the bucket name provided to you at launch). The resulting line should look something like:
Around line 19, set the REGION variable to your default lab region. You can find this at the lab panel details or simply replace the line with the code below.
Save the file.
Return to the esports-simulation.py file.
Around line 10, set the PROJECT_ID variable to your Project_ID, as with the other file, simply replace the line with the code below.
Save the file.
In this task, you will run the Python files to generate the synthetic data and run the pipeline.
Return to Cloud Shell terminal.
Confirm you are in the home directory.
Navigate to the esports directory.
Use pip to install the dependencies, specifically the Python library for Pub/Sub.
Run the simulator. This script will run continuously, sending events to your Pub/Sub topic.
You will see output indicating that events are being published in the terminal. Keep this terminal open and running.
Use the search function at the top of the console. This time, search for Pub/Sub, and click Pub/Sub in the list.
Click on esports_events_topic, which is the topic ID. You see the Subscriptions tab appear for the topic, and the esports_events_topic-sub subscription is listed.
Click on esports_events_topic-sub, which is the Subscription ID.
On the esports_events_topic-sub subscription detail page, click on the MESSAGES tab. You see a message indicating, "Click Pull to view messages and temporarily delay message delivery to other subscribers."
Click PULL. If you see messages listed here, this confirms that messages generated by the esports-simulation.py file are being received by Pub/Sub. Feel free to explore one of the messages, using the view contents button.
Open a new Cloud Shell tab. Click the + icon on the Cloud Shell terminal bar to open a second terminal.
Confirm you are in the home directory.
Navigate to the esports directory.
Install the Python Dependencies for Dataflow (apache-beam). In the new terminal, set up a virtual environment and install the required libraries.
Attempt to launch the Dataflow pipeline. Run the pipeline script using the command below. Make sure you've set your PROJECT_ID and BUCKET_NAME environment variables in this new terminal as well.
This command submits the job to the Dataflow service. It will take a few minutes for the job to start up and begin processing data.
However, at this point you will see a warning and an errors like these below:
What do these mean? First, let's start with the WARNING.
The warning indicates that the bucket used in this lab,
Regarding the ERROR... Now, let's address the ERROR... What does it mean?
There are two possible causes for this error.
The Dataflow API is not enabled. However, at the launch of your lab, we enabled this for you. You can confirm this by going to APIs & Services.
The actual cause of the error is you need to add the Cloud Dataflow Service Agent role to the service account for the Cloud Compute. Below, we will include insturctions to complete this task.
Use the search function at the top of the console. Search for Cloud Storage, and click the Cloud Storage option in the list. You see the Overview page appears.
Click Buckets. You see the Buckets page appears and your bucket,
Click on
Click on Protection. You see a list of options appears, with Soft delete policy (for data recovery) included.
Click Disable. You see a pop-up appears for Disable soft delete policy.
Click Confirm. Soft delete policy is now disabled.
Use the search function at the top of the console to go to IAM. You see the IAM page appears.
Click Service Accounts. You see the Service Accounts list appears. One of the service accounts listed is the one for Compute Engine. Your service account for the Compute Engine service would look similar to the one below:
To add the Cloud Dataflow Service Agent role to this service account, begin by clicking Actions next to it.
From the list of options provided, click Manage permissions.
Under Manage service account permissions, click Manage access. Notice the Editor role is already included.
Click + Add another role.
Use the Select a Role option. Search for and select the Cloud Dataflow Service Agent role.
Click Save.
Confirm the role is added.
Return to Cloud Shell.
Confirm you are on the second terminal tab, the one for running the Dataflow pipeline (esports-pipeline.py).
Run the following command, once again.
This time you should see a message indicating, "Autoscaling is enabled for Dataflow Streaming Engine. Workers will scale between 1 and 100 unless maxNumWorkers is specified."
This means that you have overcome the soft delete warning, and the Cloud Dataflow Service Agent error.
Use the search function at the top of the console to search for and select the Dataflow service. You see the Jobs page appears, with two Jobs of the same name. One is running and the other failed.
Click on the running job. You see the job graph appears. At the bottom of the page, you see the Logs pane.
Expand the Logs pane. You see tabs for JOB LOGS and WORKER LOGS.
Click WORKER LOGS.
Review the logs provided here. If you see logs for indicating the raw_events, player_score_updates and/or team_score_updates tables created, you can move on to the next task.
Click Check my progress to verify the objective.
In this task, you will run SQL queries to verify the results of the processed messages. To accomplish this, you will create two views, and then query the views to display the player and team leaderboards. You will also take time to reflect on how Looker could be used to enhance the leaderboard visualizations.
Return to BigQuery.
In the explorer, expand your project and select the esports_analytics dataset.
Click the + (plus) to create a new query.
In the query tab provided, enter the following query.
This query creates two views: one for the player leaderboard and the other for the team leaderboard. It will find the most recent scores for the player and the team, and rank them accordingly.
Click the plus to create a new query.
In the query tab provided, enter the following query.
Click the plus to create a new query.
In the query tab provided, enter the following query.
Using your journal, answer the following questions:
Click Check my progress to verify the objective.
You have generated Google Cloud resources to support your esports Dataflow pipeline, including a Pub/Sub topic and subscription, a BigQuery Dataset, tables and views, and the pipeline itself using simulated data generated from Python scripts. You also used Code Assist to help you explain the code in these scripts. You are becoming more confident with Google Cloud each day and can use Gemini to supplement your knowledge and skills with Data Engineering workflows.
...helps you make the most of Google Cloud technologies. Our classes include technical skills and best practices to help you get up to speed quickly and continue your learning journey. We offer fundamental to advanced level training, with on-demand, live, and virtual options to suit your busy schedule. Certifications help you validate and prove your skill and expertise in Google Cloud technologies.
Manual last updated on August 11, 2025
Lab last tested on August 11, 2025
Copyright 2025 Google LLC. All rights reserved. Google and the Google logo are trademarks of Google LLC. All other company and product names may be trademarks of the respective companies with which they are associated.


This content is not currently available
We will notify you via email when it becomes available

Great!
We will contact you via email if it becomes available

One lab at a time
Confirm to end all existing labs and start this one